This post contains affiliate links. I will earn a small commission, at no extra cost to you, if you make a purchase through these links.
DIY this easy rattan houseplant propagation station in just two steps! Be sure to check out the helpful video tutorial too for more tips and tricks that I share while working on the project myself.
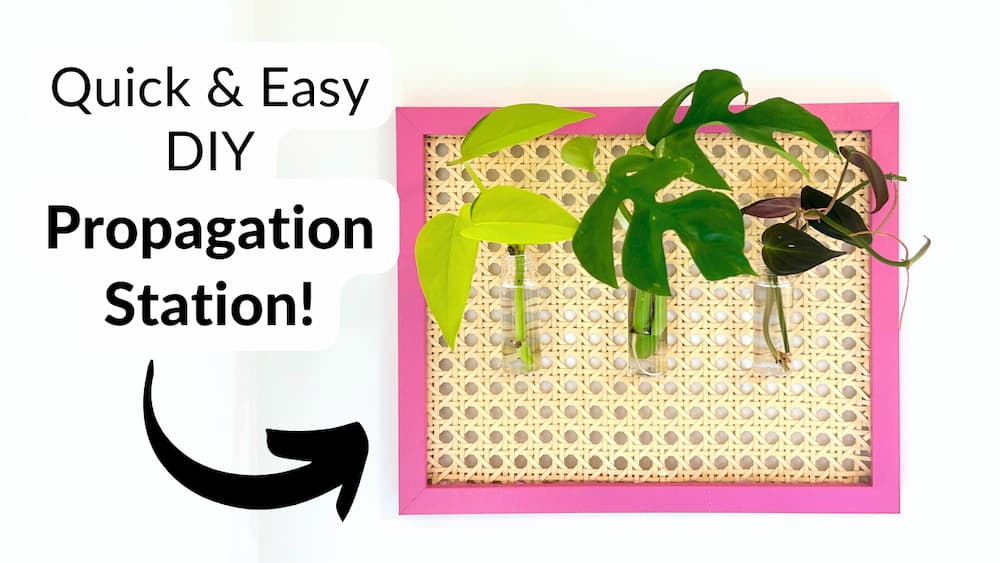
I’m obsessed with mixing and matching earthy materials (like rattan) with bright colors. Behold, I bring you this colorful picture frame rattan propagation station!
Propagation Station Supplies
DIY Rattan Propagation Station Steps
Prep your rattan and picture frame first. Cut out a piece of rattan to go in the picture frame opening. The rattan may unweave itself a little along the edges, so cut out a slightly bigger piece and you can trim it down later if needed. Then, remove the backing, photo mat, and anything else from the picture frame.
- Attach the Rattan – Hot glue the rattan piece into the back of the frame where the backing, photo mat, etc. would normally rest. Trim down the edges as you go, if needed. (Small, sewing scissors are handy for this part, but any sharp scissors will do).
- Attach the Jars – Using the monofilament line, attach the jars by wrapping the line around the lip of each jar and back through the holes in the rattan. Do this a few times, knotting it in the back, and then put a dab of hot glue on the knots to make sure it’s secure. Attach as many jars, in whatever pattern, as you’d like!
Add water to the jars, add plant cuttings, and you’re done! Dainty live or dried flowers would also look SO cute in this.
Leave a Reply