This post contains affiliate links. I will earn a small commission, at no extra cost to you, if you make a purchase through these links.
Hello friends! Today I’m going to be decorating a plain white ceramic plant pot with acrylic paint and peel-and-stick wallpaper. We’re going from DRAB to FAB in this super-easy DIY!
I’ve also included the video version of this DIY, so although it’s a relatively simple project, you can follow along with me on video and we can craft “together”!
This was inspired by a recent trip I took to Charleston, South Carolina.
It’s such a lush and colorful city, and I came back feeling totally refreshed and ready to switch all my plants’ pots from terra cotta to all the colors in the world—BUT we’re going to take a step back and start with just one pot first ?
Plant Pot Decorating Supplies
Colorful acrylic paint – The colors are totally up to you. I chose bright colors and had to go to a few different places to find all the ones I wanted, so I’m linking to a set on Amazon that has a nice variety of colors.
White acrylic paint – Again, up to you. I wanted white to lighten up some of the colors.
Peel-and-stick wallpaper – I’m in LOVE with this vintage botanical design. Even the smallest-size roll came with more than enough for endless pot decorating and other crafts.
Mod Podge – For decoupage over the top of the finished project, and for glue if you’re using something other than peel-and-stick wallpaper (like magazine cut-outs for example).
- Note: Depending on the type of Mod Podge you decide to use, it’s not waterproof, so just be a little extra careful on watering day. I plan to use this as a cache pot so I can remove the plant for watering if need be.
Paint brushes – For painting and Mod Podge-ing!
Plant pots – I used ceramic but plastic is totally fine. I highly recommend getting a white pot, especially if you’re going to be painting it a lighter color.
Plant Pot Decorating Tutorial
Part 1 – Painting
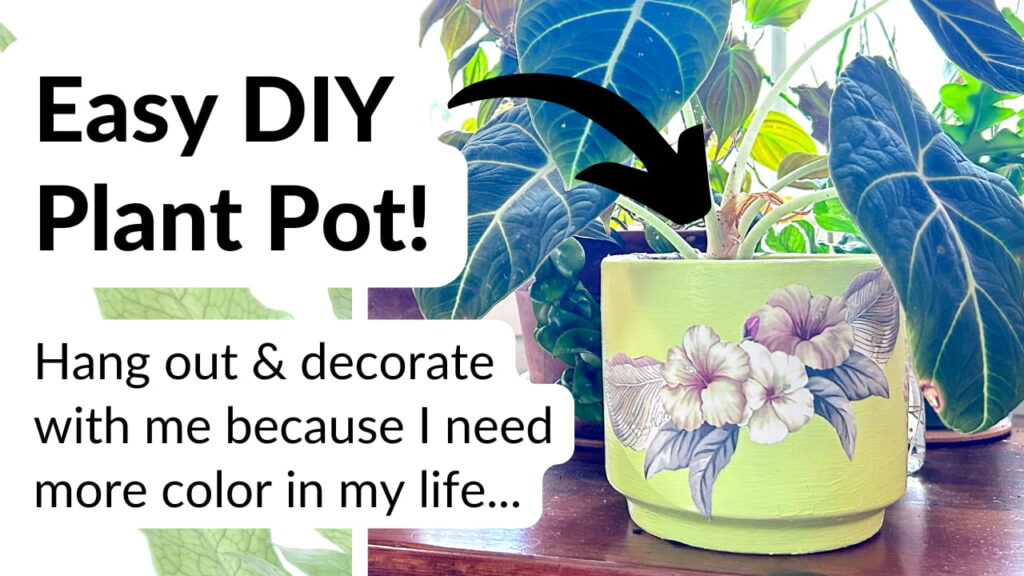
Mix your paint colors. I chose to do a light lime green, so I used bright green for the base, then put in about half that amount of yellow, then used white until I got it light enough.
Make sure the outside of the pot is clean for even painting, then paint your first coat. Let the first coat dry, then paint a second coat.
I was happy with the results after two coats, but use as many coats as you need to get the look you want. When you’re done, allow the paint to dry completely.
Part 2 – Applying the Wallpaper
Again, you don’t have to use wallpaper—I used it because I fell in love with the pattern and the fact that it was already sticky was an added bonus.
Decoupage can be done with a variety of materials, for example, magazines, paper napkins, wrapping paper, etc.
Cut out the shapes you’d like to use to decorate your pot. You can see in my video that I cut out flowers, leaves, butterflies, and bees.
Then, peel off the wallpaper and stick the designs onto the pot, or use Mod Podge to glue the designs onto the pot if you’re not using something with a stick-on backing.
If you are using the wallpaper, peel-and-stick is designed to be removed so you should be able to peel it off and reposition it if you made a mistake. (If you’re nervous about not getting it right the first time I’d recommend testing this on the bottom of the pot first.)
Part 3 – Mod Podge-ing!
Once you’re satisfied with how the designs are placed, it’s time to decoupage to secure everything.
Take a clean paintbrush and apply the Mod Podge over the top of the entire pot (even in places that don’t have designs), to give everything an even finish. If you’ve never used Mod Podge before, it goes on white but dries clear so don’t worry!
Doing this decoupage step will help the finished project look like it’s all one intentional piece as opposed to designs that were stuck onto a painted pot. Try to make your brush strokes go all in the same general direction to further help with this effect.
Once you’ve gone over the entire pot, let it totally dry, and then you’re done!
Remember, as I mentioned earlier, the Mod Podge I used and linked to is not waterproof. Be careful when you’re watering your plants. I plan to use mine as a cache pot rather than planting something directly in the pot.
If you want to put this pot outside consider applying some sort of waterproof sealer. I have not done this but if I try it I’ll update this post with my recommendations—just wanted to make sure you knew so you don’t accidentally ruin your masterpiece!
Leave a Reply