This post contains affiliate links. I will earn a small commission, at no extra cost to you, if you make a purchase through these links.
Join me while I create a beautiful (and insanely easy) DIY terrarium! And be sure to watch the helpful, step-by-step video for the detailed tutorial.
Terrariums look very intricate but they’re actually so easy to make. It’s one of my favorite hobbies. I just love creating mini worlds for my plants to live in!
Now, because of its wide shape and small opening, the terrarium I made in this tutorial should hold humidity relatively well. However, it is NOT a self-sustaining ecosystem like a closed terrarium is.
Unless you put a lid on this, you’ll need to water it somewhat regularly.
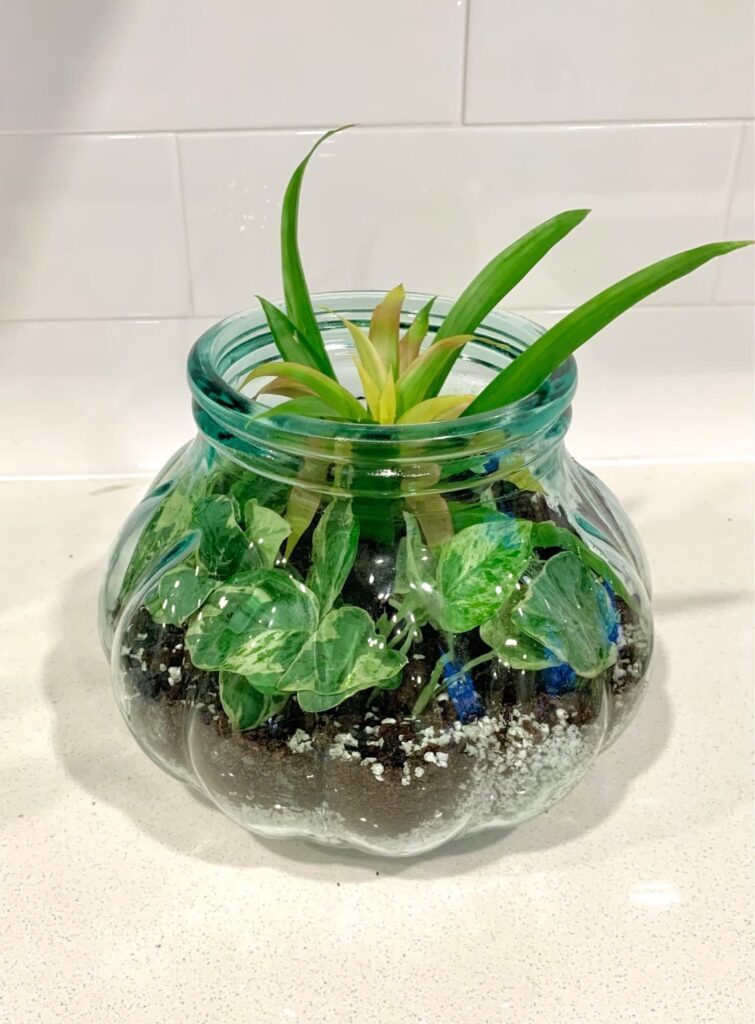
I got this beautiful vase for just a couple of bucks at Goodwill and the little plants for also just a couple of bucks from Home Depot—but it doesn’t look like it cost just a couple of bucks, right?!
Terrarium supplies
- Pebbles
- Perlite
- Charcoal
- Potting mix
- Small plants
- Large glass jar (this one comes with two!)
Alternatively, I sell closed terrarium kits so you don’t have to purchase all of these materials separately. Check them out in my shop!
Terrarium DIY steps
Create a drainage layer
Add a drainage layer to the container you’re going to use for your terrarium.
Since there are no holes, the water will need somewhere to go so your plants don’t get root rot. This is the same as if you were potting up a plant into a pot with no drainage holes.
Pebbles and perlite both work great for drainage!
Add a purification layer
Add horticultural charcoal for purification. This isn’t vital in an OPEN terrarium, but I make a lot of closed terrariums so it’s part of my general process and I like to include it—it’ll still be beneficial for the plants.
In a closed terrarium, you absolutely need charcoal to keep everything fresh. Just a thin layer of charcoal is fine!
Add potting mix
Now you can add potting mix just like you normally would when potting up a plant. Depending on the size of the terrarium, you’ll only need about one to a few inches of potting mix.
Plant your plants
Now comes the fun part—plant your plants into your terrarium and arrange them how you like. Try your best not to mess up your drainage layer while you’re doing this.
Make whatever finishing touches you need whether that’s dusting away any leftover potting mix, readjusting leaves inside the terrarium, etc.
I always have some chopsticks in my plant supplies—they’re very helpful for working in terrariums!
Caring for your terrarium
Watering
For an open terrarium like the one I made in my video, you can pour in a little bit of water if the potting medium is dry and your plants need to be watered. Just don’t overdo it since there are no drainage holes.
Remember, it’s the same as if you were using a regular pot that didn’t have a drainage hole.
If you made a closed terrarium, you should only mist it going forward rather than pouring water in. If you made a mistake and added too much water, leave the terrarium open until it dries out a bit.
The bottom line is that you should not see water pooling at the bottom. Water isn’t able to completely evaporate out of a closed terrarium—it will always stay moist so too much excess water will cause rot.
Light
Place your terrarium in bright to medium indirect light (whatever light level the plants need). Avoid direct light, especially if you made a closed terrarium as it will act like a mini greenhouse and roast your plants!
Leave a Reply