This post contains affiliate links. I will earn a small commission, at no extra cost to you, if you make a purchase through these links.
Halloween decorations for houseplants? Heck yea! In this post, you’ll learn how to make four EASY and CHEAP Halloween decorations for your plants. Be sure to watch the helpful video tutorial too!
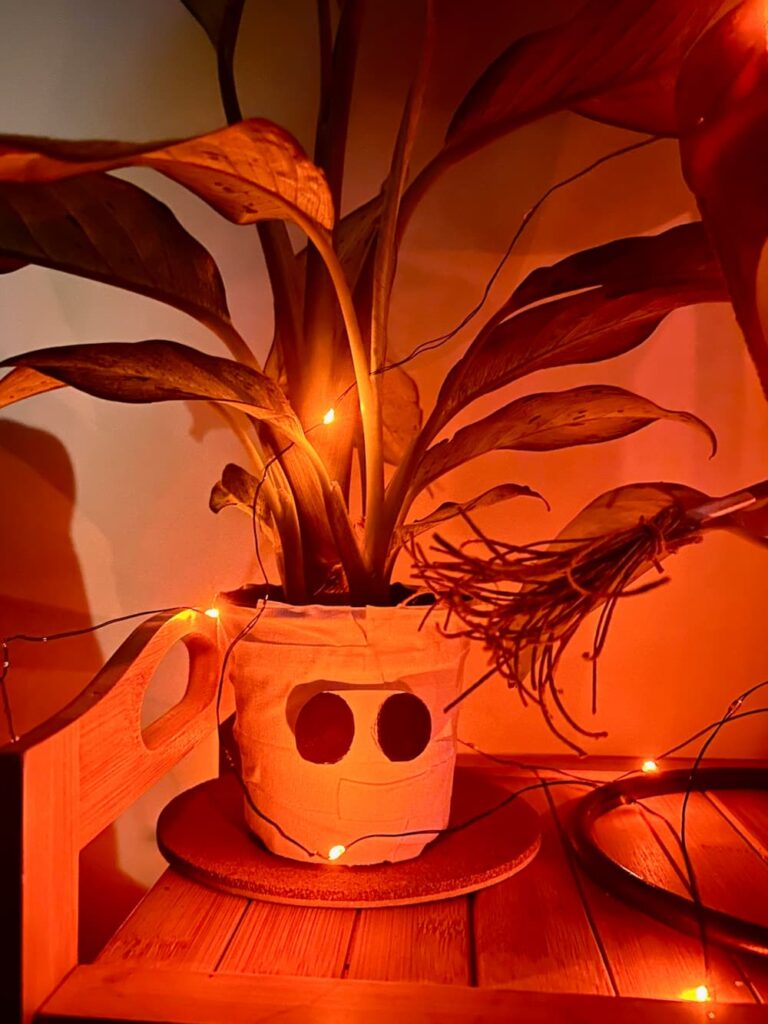
1. Plant Mummy
Supplies
- White gauze or athletic tape
- Paper
- Black marker
- OR googly eyes
Instructions
Wrap a plant pot in athletic tape or gauze. Be sure to use different-size pieces—shorter, longer, thinner, thicker—and start and end them in different spots around the pot. You don’t want it to look too uniform.
Now it’s time to give your mummy some eyes. If you’re not using googly eyes, draw two eyes on a piece of paper, then cut them out. You can be fancy and make fun eyes, or be like me and just draw two big dots.
Cut the eyes out and tape them (or the googly eyes) to the pot. That’s it! How easy was that? Imagine making a bunch of these with different-sized plants and different kinds of eyes. I think that would be such a cute look!
(This project was inspired by Clever Bloom.)
2. Flying Witch

Supplies
- Witch hat pick
- Mini broom
- You’ll see in the video that I made an impromptu mini broom out of a chopstick and hemp
Instructions
I decided to do this with an upside-down hanging planter that I already set up, but you can do this with any normal hanging basket. With a hanging basket, the plant would end up being the witch’s hair, which is adorable if you ask me!
First, stick the witch hat pick into one side of the pot, so it looks like it’s in the front towards the witch’s head.
Then, secure the mini broom to the bottom of the pot using a few pieces of tape or a dab of hot glue. In my case, the leaves were able to hold the broom in place and I didn’t need to secure it to the pot.
I thought of the broom idea as I was filming the video, so I didn’t have a mini broom on hand (imagine that!). Check out the video to see how I made my impromptu mini broom.
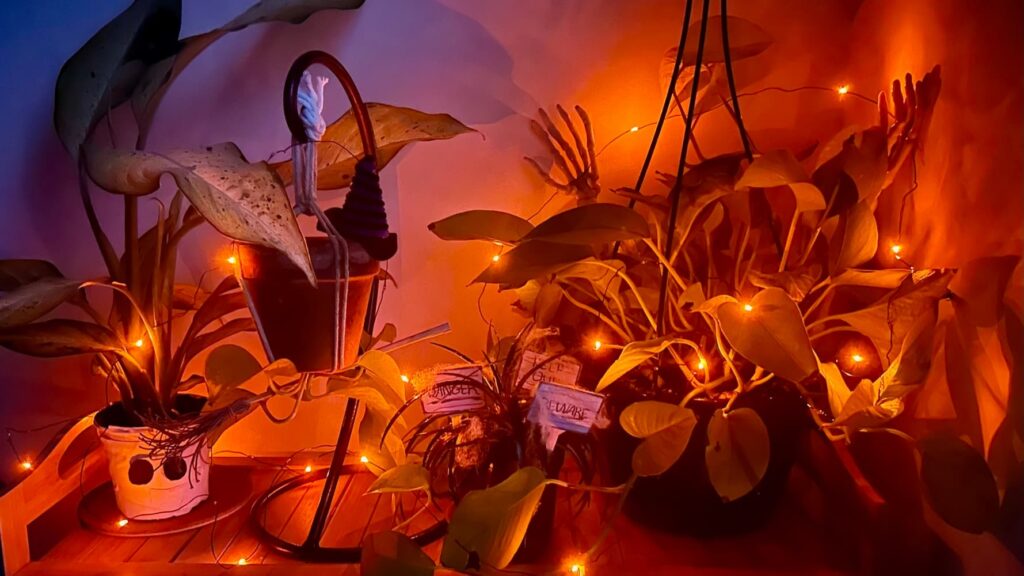
3. Spooky Signs
Supplies
- Plant label sticks
- Colored pencils
- Black marker
- Paper
- Tape
- Spider webs (optional – I used them to add more spookiness)
Instructions
Cut out some small, rectangular pieces of paper to fit the plant labels. The labels are plastic which is why you need to draw on paper and then attach the paper to the labels.
Use colored pencils to make the signs look wooden. I used a combo of black, brown, and gray, and colored horizontally to go with the grain of the “wood.”
Then, I made a few messy, darker lines horizontally to try to make it look like planks of wood. Emphasis on “try”—hey, it doesn’t have to be perfect!
Next, use a marker and your messiest handwriting to write spooky words like “danger,” “beware,” and “keep out.” Finally, tape the pieces of paper to the plant labels, and stick them in the soil.
When I was done with my signs, I didn’t think they looked scary enough so I added some fake spider webs. I really like how they look now! Kind of like you’re walking through a dark forest to explore an abandoned haunted house.
4. Night of the Living Dead Skeleton Arms
Supplies
Instructions
OK, maybe this one isn’t that much of a project, but who doesn’t love a one-step DIY, am I right?
Simply stick the skeleton arms on either side of the plant to make it look like a zombie is about to claw its way out of its grave. If that’s not spooky, I don’t know what is!
Leave a Reply