This post contains affiliate links. I will earn a small commission, at no extra cost to you, if you make a purchase through these links.
Who doesn’t love beautiful things that can be easily DIY’d for a couple of bucks? Learn how to make this easy propagation station that looks like it’s floating in the air!
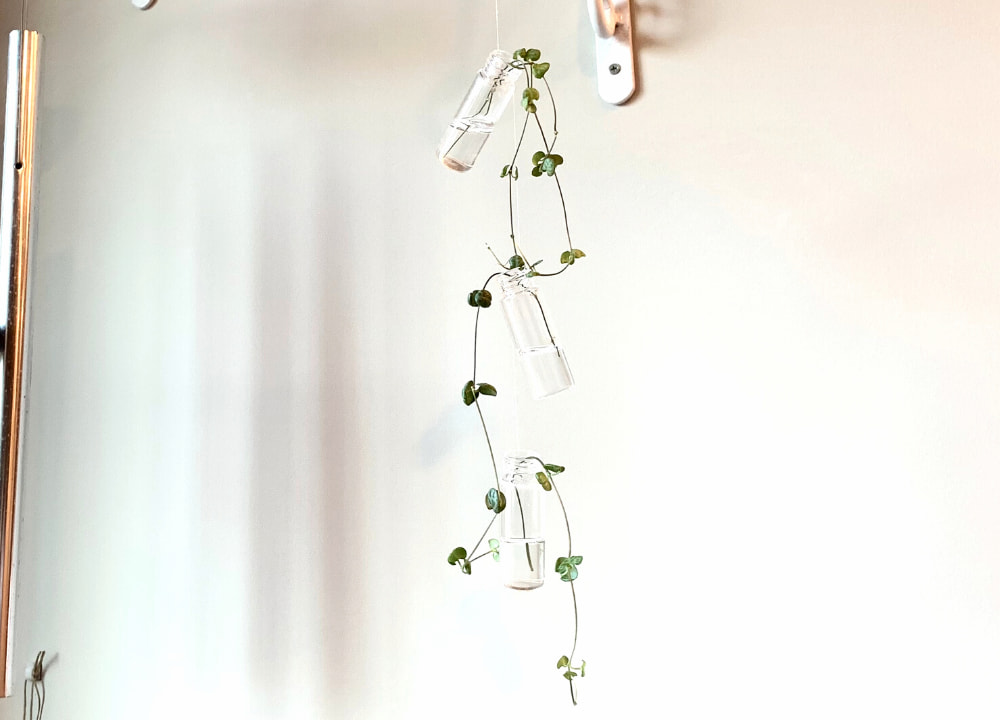
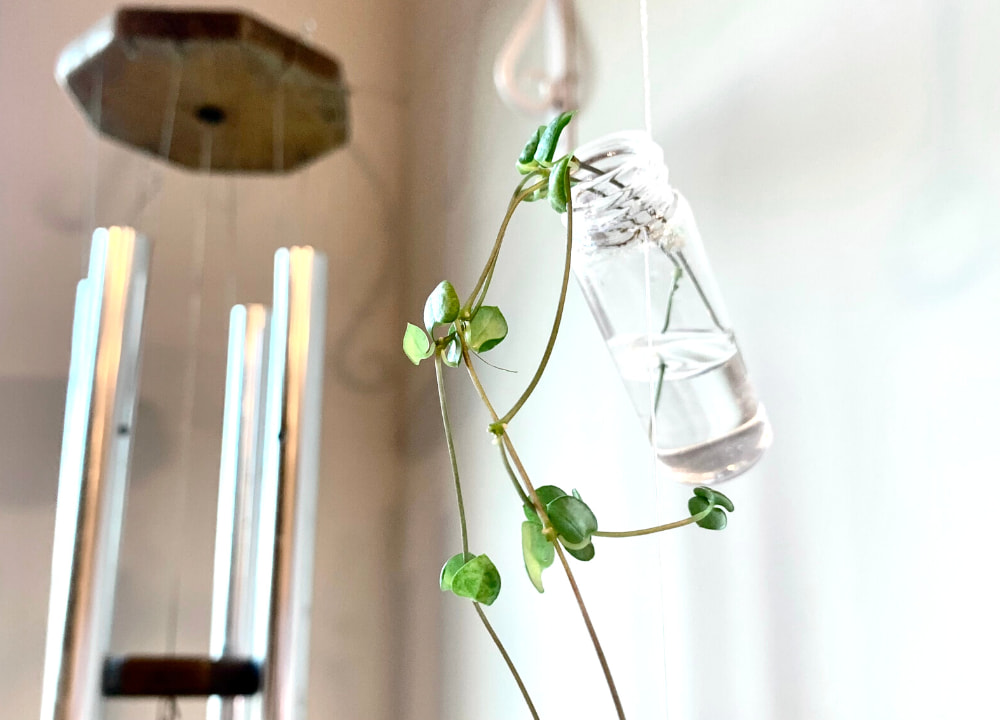
What makes this propagation station “floating” is that I used clear monofilament line to give it that illusion. If that’s not something you care about with this DIY, you can use any kind of string you want.
I also opted for tiny glass jars because I envisioned using this for some dainty little string of hearts cuttings. I definitely want to do this DIY with slightly bigger jars at some point, but I’ll have to make sure they’re SUPER secure on the monofilament line or string.
On that same note, you want to make sure the knots you tie are definitely going to hold the jars.
Because the monofilament line is slippery and wouldn’t hold a square knot well in this scenario, I secured the knots with super glue after I tied them around each jar.
Supplies list
As the title says, you can find this all at Dollar Tree (aside from the plant), so feel free to check there first!
- Monofilament line
- Small glass jars
- Super glue
- Wooden ring (what I used to hang it up)
- String of hearts
Step-by-step floating propagation station tutorial
- Decide how many jars you want to include (I chose three) and cut a piece of monofilament line. Allow for extra room on the line for the knots that you’ll be tying around each jar.
- Tie one end of your line to the hook/ring/etc. that you’re going to use to hang the propagation station.
- Move down the line to where you want your first jar to hang. Tie a knot around the opening of the first jar.
- Note: Tying the knots can be a little tricky just because of the slipperiness of the line. Be patient and have your superglue ready to go!
- Superglue the knot in place to secure it. As the glue is drying, make sure the glued part is facing up so that it doesn’t run down the side of the jar.
- Note: If you’ve never used superglue before, use caution so as to NOT glue your fingers together!
- Move down the monofilament line and repeat with however many jars you want to use, making sure to space them out how you want them.
- Important Tip: If you want to have your jars hanging in a certain way, like with the openings all facing one direction for example, pay attention to where you’re making the knots. You may have to pause after each jar to pick up the propagation station and make sure they’re hanging how you want them. Honestly, it’s pretty tricky to get them to hang in an intentional way. I went for the random look with mine and I really like it, but I still wanted to make you aware of this.
- Once you’ve finished adding all of your jars and the glue is dry, trim off any excess monofilament line, add some plant cuttings, and voila!
Leave a Reply