This post contains affiliate links. I will earn a small commission, at no extra cost to you, if you make a purchase through these links.
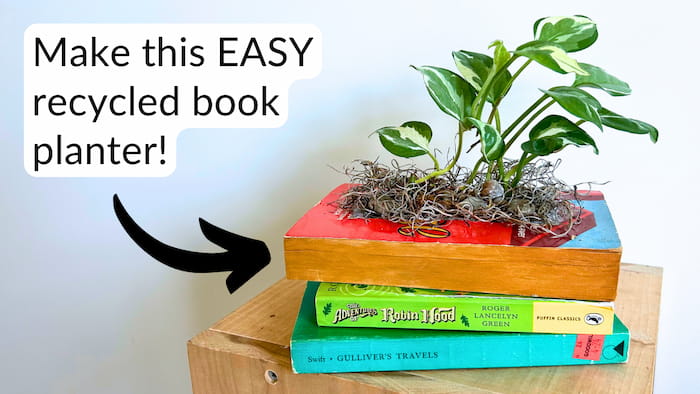
Learn how to DIY this easy book planter from recycled books! Be sure to also watch the step-by-step video tutorial for more helpful tips.
I’ve been wanting to make this project FOREVER. I always felt bad about cutting up books, but don’t worry, no NEW books were used in the making of this planter, only well-worn-out books.
I think this project is a wonderful way to give them a second life! It’s the perfect way to add a quirky touch to your houseplants or to give as a gift to a book lover in your life.
Book Planter Supplies
- Used book – Goodwill, thrift stores, your own collection, etc.!
- Small plant (I used an n’joy pothos)
- Craft knife
- Plastic wrap and/or plastic bags
- Glue (I used Mod Podge)
- Moss (optional, to cover any flaws at the end)
- Rocks (optional, to cover any flaws at the end)
Book Planter Tutorial
- On the book cover, draw the shape of the planter that you’re going to cut out. I drew a rectangle about an inch in from each side.
- Carefully use your craft knife to cut that shape out of the cover. Continue cutting that shape into the book, a few pages at a time, using the previous pages to guide your cuts. Continue until you get to around two-thirds to three-fourths into the book.
- Once you’ve finished making the planter cut out, glue the outside parts of the pages so that the book will stay shut. Make sure to use a glue that dries clear (Mod Podge does!).
- Line the inside of the planter cut out with plastic wrap and/or plastic bags. Don’t be stingy—I used eight layers of plastic wrap and a plastic sandwich bag. This is your barrier between the soil and the book and will keep the book from getting wet when you water the plant.
- Now it’s time to pot your plant into the book planter! Remember that you’ll have to use a small plant since the planter is shallow.
- Note: I think next time I do this project I’ll use two or three books, cutting the same shape into each one and then stacking them to create a deeper planter. The bottom two books in the photo at the top of this post are just for show.
- After I got the plant all situated in the book planter, I was still able to see some of the plastic lining, so I used small rocks and Spanish moss to decorate around the plant and cover up those parts. This part is up to you!
Leave a Reply